A sloped backyard can feel like a landscaping curse at first glance. Mowing on an angle is awkward, flat play space is scarce, and erosion eats away at topsoil every spring. But here’s the truth: a hillside is one of the most versatile canvases a homeowner can work with. With the right approach, that slope becomes an opportunity for terraced gardens, natural stone features, and dynamic outdoor spaces that flat yards can’t replicate. The projects below range from weekend DIY builds to larger undertakings that may require a skid steer and a permit, but all of them turn grade into an asset.
Table of Contents
ToggleKey Takeaways
- Backyard hill ideas transform sloped terrain into multi-functional outdoor spaces through terracing, retaining walls, and natural stone features that flat yards cannot replicate.
- Terraced garden beds, natural stone retaining walls, and hillside staircases require proper drainage planning, soil stabilization, and adherence to local building codes before construction begins.
- Installing water features like cascading streams or waterfalls on slopes creates dynamic focal points while managing erosion and runoff naturally.
- Prioritize safety by checking slope grades (3:1 or steeper require structural support), obtaining necessary permits, and consulting local building departments for any significant grading or construction work.
- Creative backyard solutions for hills include play areas with proper fall zones, winding mulch pathways, and anchored slides that leverage the natural grade for both function and visual interest.
Why Backyard Hills Are Hidden Opportunities
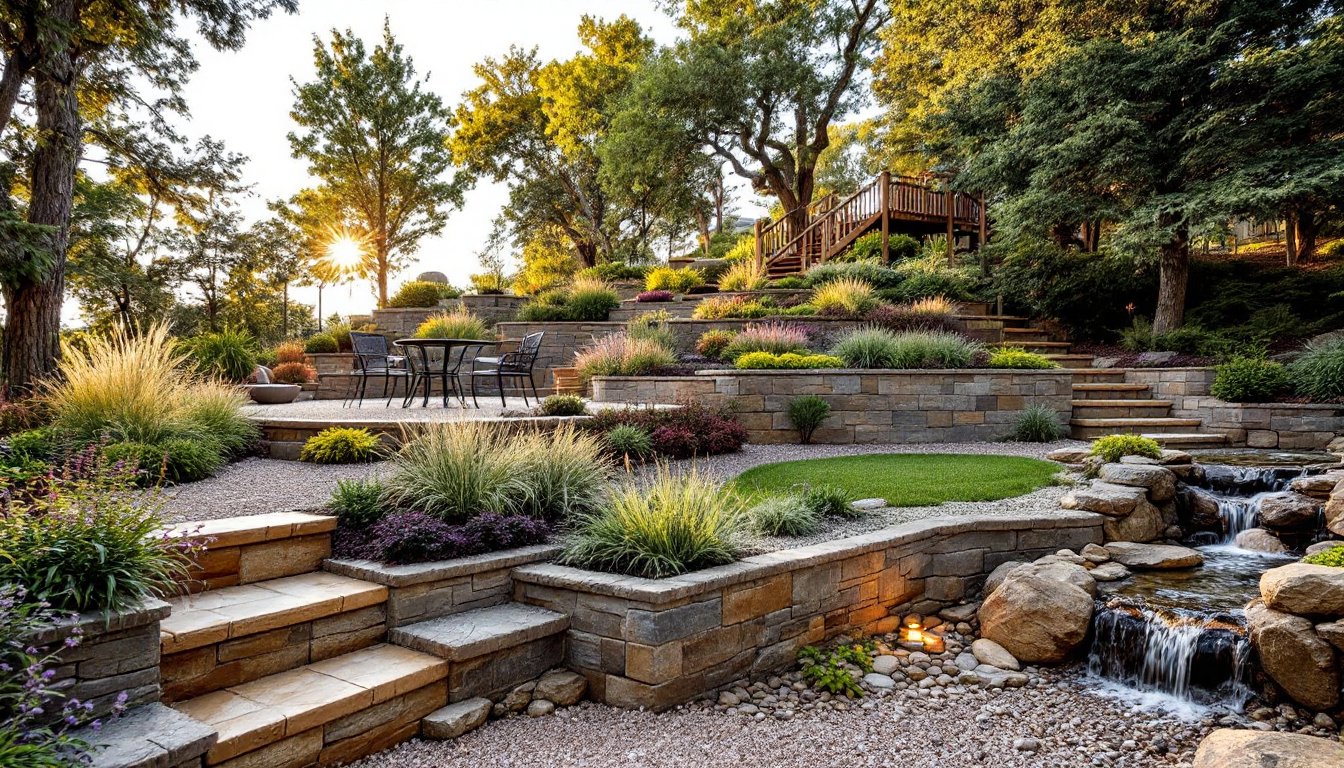
Flat lots are easy to visualize, but slopes force creative problem-solving, and that’s where great design happens. A hillside naturally defines zones without fencing or hedges. The upper terrace becomes a dining area, the mid-slope transitions to planting beds, and the lower section holds a fire pit or lawn. Gravity works in your favor for drainage, water features, and even irrigation if you plan it right.
Slopes also add vertical interest. A retaining wall or stone staircase draws the eye and creates layers that make a small yard feel larger. Plants cascade instead of sitting flat, and flowering groundcovers like creeping thyme or sedum thrive on banks where turf struggles.
That said, slopes come with real challenges. Erosion is the main enemy, bare soil on a grade washes away fast. Compacted clay or sandy loam behaves differently, so know your soil type before you dig. If the grade exceeds a 3:1 slope (three feet horizontal for every foot of rise), retaining walls or professional grading may be required by local codes. Anything structural, walls over 4 feet tall, significant cut-and-fill, or changes to drainage, usually needs a permit and engineering in most jurisdictions. Check with your local building department before moving dirt.
Terraced Garden Beds for Multi-Level Planting
Terracing transforms a steep grade into a series of flat planting zones held in place by low retaining structures. It’s an ancient technique, think rice paddies in Asia, and it works just as well for vegetables, perennials, or ornamental shrubs in a suburban yard.
Materials:
- Pressure-treated 6×6 timbers, natural stone, or modular concrete blocks (like Allan Block or Versa-Lok)
- Landscape fabric (weed barrier, not plastic sheeting)
- Crushed gravel for drainage behind walls (¾-inch clean stone)
- Topsoil or amended planting mix
- Rebar or landscape spikes to pin timbers
Steps:
-
Mark your terraces. Use stakes and string to outline each level. For stability, aim for walls 12 to 24 inches tall with terraces at least 3 feet deep. Taller walls require deeper footings and engineering.
-
Excavate the first tier. Dig a level trench for the base course. For timber walls, trench down 4 to 6 inches and backfill with compacted gravel for drainage.
-
Install the base course. Set timbers or blocks level front-to-back and side-to-side. Pin timbers with ½-inch rebar driven through pre-drilled holes. Offset joints on each course like brickwork.
-
Backfill with gravel. Place 6 to 12 inches of crushed stone directly behind the wall to prevent hydrostatic pressure from building up. Lay landscape fabric between gravel and soil to keep fines from clogging drainage.
-
Add soil and plant. Fill terraces with quality topsoil. Let it settle for a week, then top off before planting. Choose deep-rooted plants (shrubs, ornamental grasses, groundcovers) to anchor soil.
For a more budget-friendly approach, consider low-cost landscaping techniques that use salvaged stone or reclaimed timber. Terracing is labor-intensive but achievable for most DIYers with basic carpentry skills and a level.
Build a Natural Stone Retaining Wall
A dry-stack stone wall (no mortar) has a timeless look and handles freeze-thaw cycles better than mortared joints. It’s ideal for walls up to 3 feet tall: anything taller usually requires a geogrid, engineered footing, or a professional mason.
Materials:
- Fieldstone or quarried wall stone (figure roughly 1 ton per 25 square feet of wall face)
- Crushed gravel for base and backfill
- Capstones for the top course (optional but adds finish)
- Landscape fabric
Steps:
-
Excavate and lay base. Dig a trench the width of your stone plus 6 inches, down to undisturbed soil. Add 4 to 6 inches of compacted ¾-inch gravel.
-
Set the first course. Use the largest, flattest stones for the base. Bury at least half of the first course for stability. Tilt stones slightly back into the slope (about 1 inch per foot of height) for a batter that resists soil pressure.
-
Build up in courses. Overlap joints like bricks. Use smaller stones as shims to level and wedge larger ones. Avoid continuous vertical seams, they’re weak points.
-
Backfill as you go. Add gravel behind each course, tamp it down, and run landscape fabric between gravel and soil. This keeps the wall draining freely.
-
Cap the wall. Finish with wide, flat capstones set level. These protect the wall and give a clean top edge.
Stone is heavy, a single 2x1x1-foot stone weighs around 300 pounds. Rent a two-wheel hand truck or a small skid steer if you’re moving a pallet’s worth. Wear steel-toed boots and work gloves: crushed fingers are a real risk. For design inspiration and regional plant pairings, The Spruce offers detailed guides on stone wall aesthetics.
Create a Hillside Pathway or Staircase
A well-built path or staircase makes a sloped yard usable and safe. It also defines circulation and prevents worn dirt trails that erode into gullies.
Materials for steps:
- 6×6 or 6×8 pressure-treated timbers or natural stone treads
- ¾-inch crushed gravel for base and tread fill
- Rebar or landscape spikes
- Coarse sand for leveling
Design guidelines:
- Outdoor steps should have treads 12 to 18 inches deep and risers 4 to 7 inches tall for comfortable, safe climbing. Shallower risers feel more natural on gentle slopes.
- For every 10 to 12 steps, add a landing at least 3 feet deep to break the climb.
Steps for timber stairs:
-
Measure the slope. Drive stakes at top and bottom, stretch string level between them, and measure total rise and run. Divide rise by desired riser height to find number of steps.
-
Cut and level the first tread. Excavate a flat pad for the bottom timber. Set it level side-to-side and pin with rebar.
-
Build upward. Each timber sits slightly into the slope. Backfill behind with gravel, compact, and add the next tread. Overlap timbers at joints for strength.
-
Surface the treads. Fill with compacted gravel or coarse sand for traction. Some builders top with flat flagstone for a cleaner look.
For stone treads, use thick slabs (3 to 4 inches) set on a gravel base. Thinner stones crack under foot traffic and frost heave.
If your hill is long and winding, a gravel or mulch path with landscape edging works well. Lay landscape fabric, edge with steel or plastic benderboard, and fill with ¾-inch pea gravel or shredded hardwood mulch. This suits gentle grades where steps aren’t necessary. Many successful landscape design projects use meandering paths to soften formal plantings and create exploration.
Install a Backyard Slide or Play Area
A slope is a natural slide foundation, kids (and adults) love it. You can buy a prefab molded-plastic hill slide designed to embed into a slope, or build a DIY platform slide if you have carpentry skills.
Safety considerations:
- Runout zone: The bottom of the slide needs at least 6 feet of flat, soft landing area. Use engineered wood fiber (EWF), rubber mulch, or a safety mat rated for fall height.
- Slope angle: Most commercial hill slides are designed for grades between 25 and 35 degrees. Steeper is faster and riskier.
- Anchoring: Slides must be anchored with ground stakes or concrete footings to prevent shifting. Follow manufacturer specs.
Materials for a basic platform slide:
- Pressure-treated 4×4 posts and 2×6 or 2×8 framing
- Slide section (buy commercial-grade plastic or stainless steel: DIY wood slides are too rough and splinter)
- Concrete mix for footings
- Deck screws and galvanized bolts
Steps:
-
Mark post locations. Set posts in 12-inch diameter holes, 3 feet deep, below frost line. Pour concrete, plumb posts, and let cure 48 hours.
-
Frame the platform. Bolt 2×8 joists to posts. Platform should be level at the top of the slide.
-
Attach the slide. Bolt slide chute to platform framing per manufacturer instructions. Ensure a smooth, snag-free transition from platform to slide.
-
Install railings and stairs. Use 2×4 or 2×6 rails at least 36 inches tall. Balusters should be spaced no more than 4 inches apart to meet residential code (IRC R312).
Wear safety glasses and use a miter saw or circular saw with a guide for clean, square cuts. Pre-drill all bolt holes to avoid splitting.
Design a Cascading Water Feature
Water and slopes are a natural pairing. A hillside stream or waterfall adds sound, movement, and a focal point that’s impossible on flat ground.
Materials:
- Pond liner (45-mil EPDM rubber) or a preformed waterfall spillway
- Submersible pump sized for your flow rate and head height (measure vertical rise from reservoir to top)
- Flexible PVC tubing
- River rock, flagstone, and boulders for edging and spillways
- Underlayment fabric to protect liner from punctures
Steps:
-
Dig the reservoir. At the base of the slope, excavate a basin 18 to 24 inches deep for the pump and water storage. Line with underlayment and EPDM liner, leaving excess at edges.
-
Create the streambed. Excavate a shallow channel (4 to 6 inches deep, 12 to 18 inches wide) up the slope. Compact soil, lay underlayment and liner.
-
Set spillways. Use flat stones or preformed spillway units at drops to create waterfalls. Each drop should be 4 to 12 inches for visual and auditory effect. Seal edges with additional liner or waterfall foam.
-
Place the pump. Submerge pump in reservoir on a brick or flat stone to keep it off the bottom (reduces debris intake). Run tubing up the slope, burying it alongside the streambed.
-
Camouflage and test. Cover liner edges with river rock, boulders, and plants. Fill reservoir, power the pump, and adjust flow. Typical flow rates range from 500 to 2,000 gallons per hour depending on length and height.
Maintenance:
- Top off water weekly in hot weather (evaporation).
- Clean pump intake monthly.
- Winterize in cold climates: drain and store pump indoors.
A cascading feature uses less water than a full pond and integrates beautifully with terraced plantings or stone walls. According to Gardenista, combining water features with tiered planting beds maximizes visual impact while managing runoff. For electrical work, hire a licensed electrician to install a GFCI-protected outdoor outlet. Running a pump on an extension cord is a code violation and a shock hazard.
Conclusion
A sloped backyard isn’t a limitation, it’s a three-dimensional playground. Whether the project is a single terraced bed, a full stone staircase, or a backyard waterfall, the key is working with the grade instead of fighting it. Start with drainage, respect structural limits, and don’t skip the permit check. The result is outdoor space that flat yards simply can’t match.